How to craft cider
1. Apples
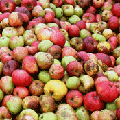
In finding apples you can be as selective or free as you like – apples are generally available in the UK, from roadside trees, shops and specialist orchards. A friend or relative will almost certainly have a tree in their garden.
While this will give you a quantity of apples to make cider with, bear in mind that the quality of apple you put in to making cider will probably determine the quality of the drink. Most makers are not so lucky as to have access to a range of specific varieties – although you may want to consider what kind of apples you want for a specific style of cider (see styles).
When deciding on quantity of cider to make, do bear in mind that, even with the right equipment, you can expect to obtain around 10 litres of apple juice for every 15-20kg (33-44lb).
2. Prepare your equipment
Whatever equipment you have, make sure that it is clean (washed) and sterilised before using it for making cider. Cleanliness will never go unrewarded as far as cider making is concerned.
Click here for more information about general equipment
3. Prepare the apples
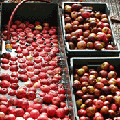
i. First of all, wash the apples. This removes loose dirt and leaves. Also, it’s useful to check for rotten apples. A bit of bruising is fine, even a little rot. However, any that have ‘turned’ or decayed too far will need discarding.
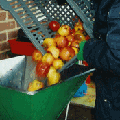
ii. Mill the apples. This is a discussion in its own right. Very small scale cider makers need only use a blender to break the apples up into small chunks. Anything more than a few kilograms would be better done with a ‘Pulpmaster’ or small hand mill. About 3-400kg of apples will probably need some heavier or electric mill. See the equipment list for further information.
Click here for more information about fruit mills
4. Extract the juice
There are several ways to do this. Essentially, contain the apples within a cloth (anything that will allow the juice to escape without the pulp), and press them.
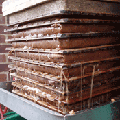
Of course, if you are serious about crafting cider an apple press is a must have. Examples of these can be found in the equipment page. As with all things, the size and cost of press increase respectively, although again, you can make your own!
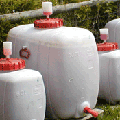
Don’t forget to catch the juice in a sterile container / bucket / demijohn / barrel, which can be used to ferment the cider
Click here for more information about fruit presses
5. OPTION. Clearing out wild yeast and pitching with cultured yeast.
This is not an option for many craft cider makers, who do not wish to leave their cider fermentation to chance. However, for the benefit of the purists, this is shown as an option (purists will not add or take away anything from the apple juice, and allow nature to ‘take its course’… apples will ferment with wild yeast)
For the rest of us, add sodium metabisulphite to the juice to kill off wild yeast. Quantities and practice is best discussed on the Wittenham Hill Cider Portal and repeating it here will not add to understanding, although a general approach is to add 1 campden tablet per gallon. This needs to be left for around 48 hours before pitching bought or cultured yeast into the juice. Alternatively if you leave the sulphited juice for a week or two under airlock, the benign strains of wild yeast will multiply and start to ferment spontaneously after the adverse yeast and bacteria have died out.
Other things:-
i. At this point you will/may wish to check the potential alcohol content with a hydrometer. Anything above 6% will enable the cider to store. Now is the time to make any alcohol adjustments, although normally the addition of sugar should not be necessary.
ii. You may also want to consider adding a pectin enzyme (e.g. pectolase), depending on how long the apple pulp has been stood (if you are pressing the apples immediately after milling, this should’t be a problem unless you are using dessert fruit). Also, a yeast nutrient might help the fermentation. With both of these, we recommend consulting the Wintenham Hill website, as understanding of what is going on is key.
6. Fermenting cider
What can we say, if the weather is sufficiently warm and all things are well, the juice will start to ferment between 12 hours and a few days. The fermentation will go on for between 7 days and a few months (depending on ambient temperature). The best way to monitor progress is to check every couple of days with a hydrometer.
You may wish to start things off with an aerobic fermentation (essentially, leave the lid of the container off but cover with something that lets the air in but not flies, because this allows the yeast cells to grow strong cell walls, and the first few days of fermentation can be a bit turbulent!) However, you should seal the container and fit an airlock at some point to stop excess air getting in (an anaerobic fermentation). As the cider ferments, a ‘blanket’ of carbon dioxide will form which will protect the cider from spoilage.
Cider fermentation will use up pretty much all of the available sugar, so you will end up with a dry, flat drink with a basic fermentation (yum!) A hydrometer reading of below 1005 will indicate things are nearing an end.
7. Storing cider
Rack off the cider from the lees by using a tube into a fresh, sterile container (with airlock to prevent air ingress). At this point you have cider. However, you might want to leave it to mature for a few months before drinking. If you leave it until the following spring you may even get a malolactic fermentation (a second fermentation which will reduce acid tones in a cider).
Cloudy cider or clear cider???
This is personal, but you should consider whether you choose to leave the cider on the dead yeast (cloudy cider) or whether you rack it off (draw the cider off the dead yeast into a clean container). If you store the cider to mature, you may want to do this a second time as further yeast may have settled. In doing so you will have a clearer cider, although there is a further exposure to air to some degree.
Click here for more information about storage
8. Bottling cider
If you intend to bottle your cider, we advise glass ale bottles (with a crown cap) or champagne bottles, unless you are absolutely sure that there is no chance of further fermentation. Also, plastic is fine if you are intending to drink the cider within a few months. A number of people who sell cider use ‘manicubes’ (essentially the same as the boxed wines you can get in supermarkets). These store larger quantities of cider, although this is time limited to a several months.
At this point you may want to add further sodium metabisulphite to help the cider keep for longer. For more information about this, consult Andrew Lea's website
This is a fairly basic explanation of the crafting of a cider. We realise that there are bits missing and that we have not explained some of the terminology. This is deliberate, as what we really want you to do is to take a look at Andrew Lea’s website and really understand the process.
If anything goes wrong, or if you are unsure about any part of the process, join us in the Cider Workshop discussion group and ask away!
We owe a debt of gratitude to Andrew Lea for making his web resource available to us to reference. It is an excellent technical discussion of craft cider making.
Please select the image links below to access pages on the Wittenham Hill website.


